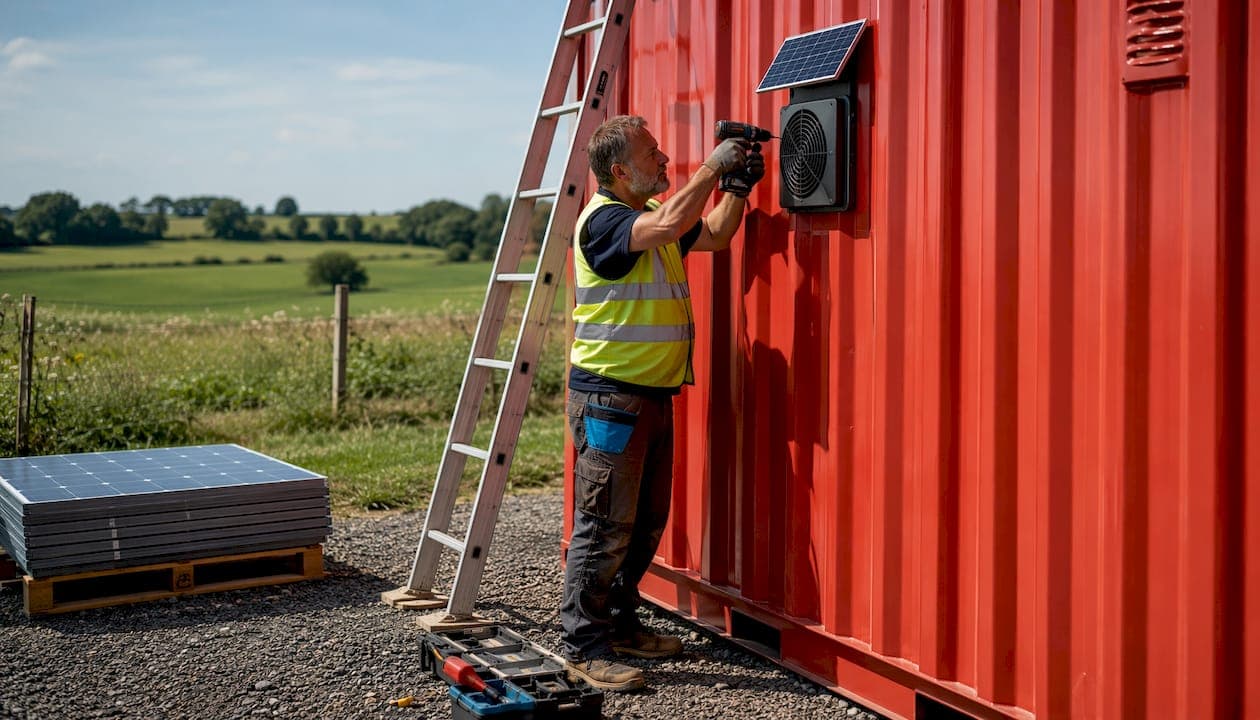
For most rural and off-grid containers, the right setup is a solar-powered exhaust fan mounted near the roof on one end, paired with a low passive intake vent on the opposite end. That single combination handles moisture, heat, and air quality without any grid connection. Ventilation is the single most important upgrade for almost any shipping container because it prevents condensation and excessive interior heat. Start by measuring your container volume, then use the CFM formula in Section 3 to pick the right fan size.
Passive vents alone are acceptable when all of these conditions are true:
- The container stores only dry, inert goods (tools, hardware, seasonal equipment)
- Your site has consistent natural wind and low ambient humidity
- Interior temperatures rarely exceed outdoor temperatures by more than 10°F
- No people, animals, electronics, or moisture-sensitive materials are inside
- The container sits on a well-drained, elevated pad away from standing water
For workshops, occupied spaces, sensitive storage, or humid climates, active solar ventilation is the practical answer.
Table of Contents
- Which ventilation approach fits your container's actual use?
- How do you size ventilation for a 20' or 40' container?
- What solar ventilation system types and parts do you need?
- How do you size solar panels and batteries for off-grid fans?
- Installation best practices: intake, exhaust, sealing, and mounting
- How ventilation interacts with condensation and moisture control
- Routine maintenance and troubleshooting for solar vent systems
- What solar ventilation setup does Westernharmonics recommend?
- Safety considerations during installation and operation
- What does a solar ventilation setup cost for an off-grid container?
- Key Takeaways
- The case for getting the airflow circuit right the first time
- Westernharmonics solar fan kits for off-grid containers
- Useful sources and further reading
Which ventilation approach fits your container's actual use?
Matching the ventilation method to the use case prevents both under-engineering and wasted spending. Industry professionals emphasize that storage of inert items needs simple moisture mitigation, while workshops and occupied containers require active airflow management.
| Use Case | Recommended Tier | Notes |
|---|---|---|
| Dry goods storage | Factory louvers + added low intake | Adequate in low-humidity, sheltered sites |
| Sensitive storage (electronics, seed) | Turbine vent or solar fan | Needs controlled extraction |
| Workshop / garage | Solar fan 300–800 CFM | Active extraction required |
| Occupied / habitable | Solar fan + battery backup | Continuous airflow mandatory |
| Battery / energy storage | Controlled solar extraction | Avoid uncontrolled passive intake |
Climate and site conditions shift these recommendations significantly. Coastal and humid inland sites face a specific risk: passive vents can worsen condensation by drawing in moist outside air overnight, so controlled active extraction is more predictable in those environments. Sheltered, arid sites tolerate passive solutions better. Containers with heavy sun exposure on the roof need more aggressive extraction than shaded ones.
Pro Tip: Before cutting any steel, identify your actual moisture source. Is condensation forming on the walls overnight (a temperature differential problem), or is the interior humid all day (a ventilation volume problem)? The fix differs, and cutting extra holes without knowing the answer can make things worse.
How do you size ventilation for a 20' or 40' container?
The core formula is straightforward:
CFM required = (Container volume in cubic feet × Target ACH) ÷ 60
ACH targets by use:
- Dry storage: 4–6 air changes per hour
- Workshop: 10–15 ACH
- Occupied space: 15–20 ACH
Worked Example 1: 20' container, workshop use
- Interior volume: 20 ft × 8 ft × 8.5 ft = 1,360 cu ft
- Target ACH: 12
- CFM = (1,360 × 12) ÷ 60 = the required airflow to meet workshop needs
A single solar fan sized for the calculated airflow covers this with a margin for duct losses.
Worked Example 2: 40' container, workshop use
- Interior volume: 40 ft × 8 ft × 8.5 ft = 2,720 cu ft
- Target ACH: 12
- CFM = (2,720 × 12) ÷ 60 = the required airflow to meet workshop needs
A 40' container at workshop ACH needs either one high-output solar fan suitably sized or multiple mid-range units. Factory louvers move only minimal airflow individually, giving a total passive airflow of roughly 10–40 CFM, which falls far short of workshop requirements. Turbine vents typically move about 100–300 CFM in normal wind, which covers dry storage but not active workshop use.
Sizing checklist:
- Intake free area should equal or exceed exhaust free area
- Mount exhaust fan within 12" of the roof peak
- Verify airflow with a simple anemometer at the intake after install
What solar ventilation system types and parts do you need?
Solar container ventilation systems fall into two categories: direct-drive and battery-backed.
Direct-drive systems connect the solar panel directly to the DC fan. No charge controller, no battery. The fan runs hardest at solar noon and slows or stops at night. For most storage and daytime workshop use, this is the right choice. It is simpler, cheaper, and requires almost no maintenance beyond panel cleaning.
Battery-backed systems add a charge controller and a battery bank. The fan runs at consistent speed regardless of cloud cover and continues through the night. This matters for occupied containers, battery storage rooms, or any situation where overnight moisture extraction is needed.
Core components for a solar vent kit:
- Solar panel (sized to fan wattage, typically 10–25W for most container fans)
- DC fan with weatherproof housing (rated for outdoor continuous duty)
- Roof adapter or wall flange matched to your container's corrugated profile
- Charge controller (battery-backed systems only)
- Deep-cycle battery (battery-backed systems only)
- UV-resistant wiring and weatherproof connectors
- Corrosion-resistant mounting hardware (stainless steel preferred)
- Butyl or silicone weather seal for the flange perimeter
Solar-powered fans in the 10–25W range can produce roughly 300–800 CFM depending on panel wattage and fan design. Battery packs extend runtime to dusk or enable continuous operation.
How do you size solar panels and batteries for off-grid fans?
Size the solar array for peak daytime operation first, then add battery capacity only if continuous or nighttime extraction is required.
Assumptions:
- US average peak sun hours: 4–6 hours/day (Southwest), 3–4 hours/day (Southeast/Midwest), 3–4 hours/day (Northeast)
- Typical fan wattage: 10–25W for 300–800 CFM solar fans
| Fan Type | Panel Size | Battery (if 24/7) | Runtime Without Battery |
|---|---|---|---|
| Direct-drive 15W | 20W panel | Not needed | Daylight hours only |
| Battery-backed 25W | 30–40W panel | 20–40 Ah (12V) | Dusk-to-dawn extension |
For a 15W direct-drive fan in the Southwest (5 peak sun hours), a 20W panel delivers adequate power with headroom for partial cloud cover. In the Northeast, size up to 25W to compensate for lower irradiance. For battery-backed operation, a 20 Ah 12V battery provides roughly 8–10 hours of fan runtime at 25W draw, enough to cover a full night cycle. When a site already has an AC grid connection within 50 feet, a hardwired AC fan is often more cost-effective than a large battery bank.
Installation best practices: intake, exhaust, sealing, and mounting
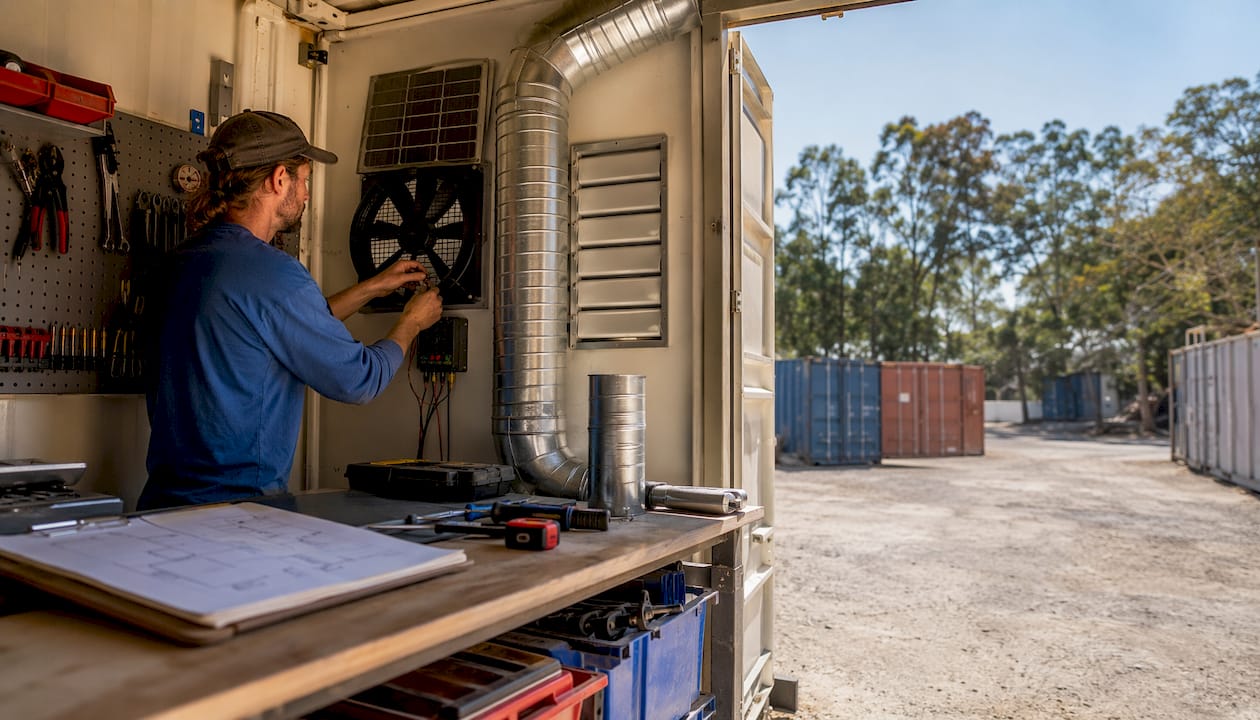
The airflow circuit is the non-negotiable starting point. Pair a high exhaust on one end with a low intake on the opposite end to create diagonal cross-ventilation across the full container length. An exhaust fan with no intake opening simply does not move air.
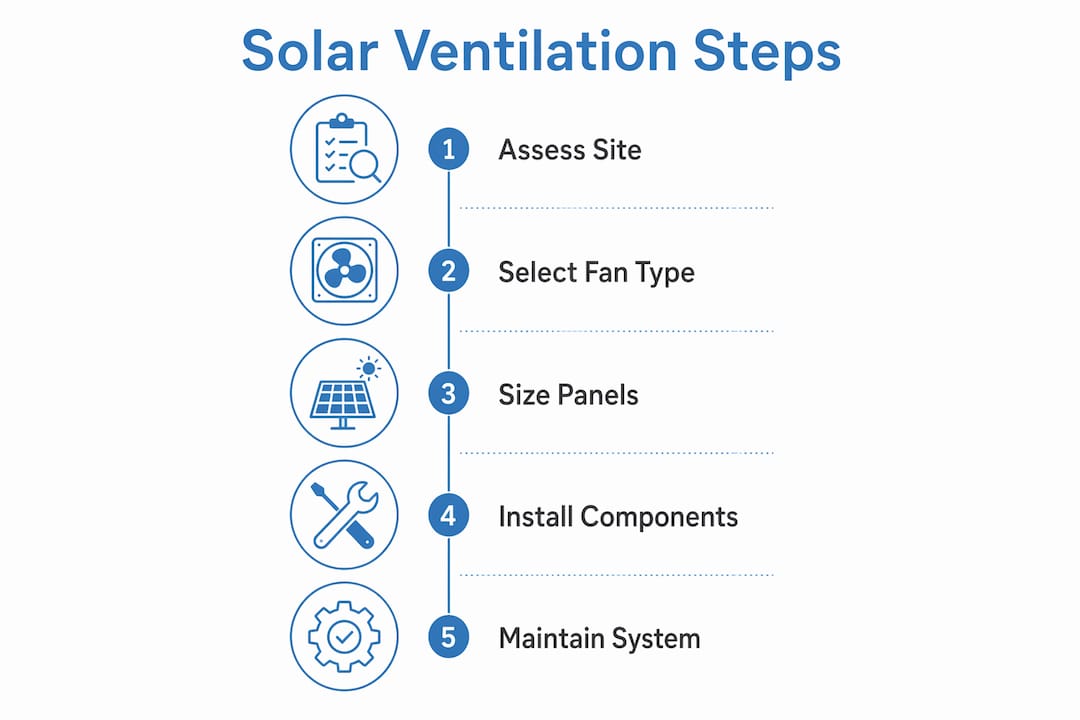
Installation checklist:
- Mark exhaust location within 12" of the roof peak, on the prevailing downwind end
- Mark intake location 12–18" above the floor on the opposite end
- Cut openings with an angle grinder; deburr all edges immediately to prevent rust
- Apply cold galvanizing compound to all cut edges before mounting flanges
- Bed the flange in butyl tape or silicone; fasten with stainless steel screws
- Install insect screen behind the intake louver
- Mount the solar panel at 15–30° tilt facing south for maximum output
- Run wiring through a weatherproof conduit; use UV-rated cable ties
- Test fan rotation direction (exhaust, not intake) before sealing the panel junction box
Do not do these:
- Place the intake where roof runoff or pooled water can enter
- Block factory louvers with shelving or stored goods
- Install a single high exhaust without any intake opening
- Use bare steel fasteners in coastal or high-humidity sites
How ventilation interacts with condensation and moisture control
Ventilation alone does not always stop condensation. The steel walls of a container cool rapidly at night, and when warm, humid air contacts that cold surface, water condenses inside. This is called "container rain," and it can cause rust and mold even in a well-ventilated box.
In damp climates, extra passive intake can pull in humid air and increase internal condensation overnight. The solution is controlled extraction: run the solar fan during the day to exhaust humid air, and seal passive intakes at night if moisture is severe.
Combined moisture-mitigation strategies:
- Raise stored goods on pallets to allow airflow beneath and prevent ground moisture wicking
- Place desiccant bags or calcium chloride containers for sealed or low-ventilation periods
- Apply spray foam or rigid foam insulation to the ceiling and upper walls to reduce the cold-surface condensation zone
- Use a small dehumidifier with a battery backup for occupied or electronics storage containers
Pro Tip: Do a simple dew-point check before upgrading vents. On a cool morning, check whether condensation forms on the inside walls or only on the floor. Wall condensation points to a temperature differential problem that insulation solves; floor condensation usually means ground moisture is the culprit, and a vapor barrier under the container is the fix.
Routine maintenance and troubleshooting for solar vent systems
Inspect vents at least twice a year; increase frequency near trees, salt air, or dusty agricultural sites.
Annual tasks:
- Clean solar panel surface with a soft cloth and mild soap; check for micro-cracks
- Inspect all flange sealant lines; reapply silicone where cracking or gaps appear
- Check all fasteners for corrosion; replace any that show rust
- Test fan rotation and listen for bearing noise
- Inspect wiring insulation for UV degradation or rodent damage
Semi-annual tasks:
- Clear insect screens of debris and dust
- Verify intake and exhaust are unobstructed by stored goods or vegetation
- Check battery terminals for corrosion (battery-backed systems)
Troubleshooting flow:
- Low airflow: Check screen blockage first, then verify panel output with a multimeter, then inspect fan blade for debris
- Fan noise: Bearing wear is the most common cause; most DC fan bearings last 30,000–50,000 hours but degrade faster in dusty environments
- No operation: Check wiring connections at the panel junction box and at the fan; test panel voltage in direct sun
- Seasonal drop in output: Normal in winter at northern latitudes; tilt the panel steeper (toward 45–60°) to capture lower sun angles
Replacement intervals: fan motors typically last 5–10 years in outdoor duty; solar panels retain useful output for 20–25 years with proper panel maintenance. Replace sealant every 5–7 years regardless of appearance.
What solar ventilation setup does Westernharmonics recommend?
For most rural and off-grid containers, the right configuration is a solar-powered exhaust fan sized to hit your ACH target, paired with low intake louvers, and a small battery backup only when 24/7 extraction is genuinely needed.
Westernharmonics has pioneered the solar fan kit market in the United States, designing and manufacturing high-efficiency DC ventilation systems built for exactly this kind of off-grid, rural application. The kits are engineered for durability in barns, workshops, and remote infrastructure where grid power is not an option.
Checklist for choosing a Westernharmonics kit:
- Match CFM rating to your calculated requirement (use the formula in Section 3)
- Confirm panel wattage is appropriate for your region's peak sun hours
- Verify the mounting flange fits your container's corrugated roof profile
- Check the fan's duty-cycle rating (continuous outdoor duty preferred)
- Confirm warranty coverage for both the panel and the fan motor
Safety considerations during installation and operation
Cutting corrugated steel and working with DC electrical systems both carry real risks. Follow these practices on every install.
Electrical safety:
- Use only DC-rated wiring, connectors, and fuse holders for solar circuits
- Install an inline fuse within 12" of the battery positive terminal on battery-backed systems
- Never connect or disconnect wiring while the panel is in direct sunlight; cover the panel first
- Keep all wiring connections inside weatherproof junction boxes rated for outdoor use
Physical and weatherproofing safety:
- Wear cut-resistant gloves and eye protection when cutting container steel
- Apply cold galvanizing compound to all cut edges within 30 minutes of cutting
- Use a safety harness when working on container roofs; the corrugated surface is slippery when wet
- Confirm the container is on stable, level ground before climbing
For any system that incorporates AC-line power or connects to a larger off-grid electrical system, consult a licensed electrician. Local electrical codes in many US jurisdictions require permitted work for systems above 50V or connected to a structure's wiring.
What does a solar ventilation setup cost for an off-grid container?
A basic direct-drive solar fan kit for a 20' container runs in the range of $80–$200 for the fan and panel combined, depending on CFM rating and panel wattage. Adding a low intake louver adds $20–$60. A battery-backed system with a charge controller and 20 Ah battery adds roughly $100–$200 to that baseline.
For a 40' container needing two fans, budget $300–$500 for a complete direct-drive setup, or $500–$800 for a battery-backed dual-fan system. These figures cover hardware only; professional installation adds cost depending on your region.
The most cost-effective upgrade path: start with a single solar fan and a low intake louver, measure the result, and add a second fan or battery backup only if the first unit does not hit your ACH target.
Key Takeaways
Solar-powered exhaust fans paired with low passive intakes are the most practical and cost-effective shipping container ventilation solution for off-grid rural use.
| Size before you buy | Use CFM = (volume × ACH) ÷ 60; a 20' workshop needs approximately 270 CFM minimum to reach 12 ACH. | Direct-drive first | Start with a direct-drive solar fan; add battery backup only for overnight or 24/7 needs. | | Airflow circuit is mandatory | Always pair a high exhaust with a low intake on the opposite end for real cross-ventilation. | | Ventilation plus moisture control | In humid sites, combine active extraction with pallets, desiccants, or insulation to stop condensation. | | Westernharmonics kits | Match CFM, panel wattage, and mounting profile to your container spec using Westernharmonics' field-proven solar fan kits. |
The case for getting the airflow circuit right the first time
There is a persistent assumption in the DIY container world that more vents automatically means better airflow. It does not. We have seen containers with four or five upper louvers that still trap heat and moisture because there is no low intake to complete the circuit. The air has nowhere to come from, so the fan just recirculates the same stale pocket near the roof.
The other underestimated problem is passive venting in humid climates. Many owners add louvers expecting improvement and instead get worse condensation because they have opened the container to moist night air without any controlled extraction. The fix is not more holes. It is the right holes in the right places, with a solar fan that runs when the sun is up and the humidity differential is manageable.
Solar ventilation does one thing that passive systems cannot: it runs hardest exactly when the problem is worst, at solar noon when interior temperatures peak and the pressure to exhaust heat is greatest. That alignment between power source and cooling demand is what makes solar fans the practical choice for off-grid containers.
Westernharmonics solar fan kits for off-grid containers

Westernharmonics builds solar fan kits specifically for the off-grid rural market, with DC ventilation systems that run without grid wiring, handle the dust and heat of agricultural environments, and are sized for real container CFM requirements. Every kit is designed for straightforward installation and long-term reliability, not just a first-season result.
What Westernharmonics offers:
- Pre-matched solar fan kits sized for 20' and 40' containers
- DC micro-power units for direct-drive and battery-backed configurations
- Automated microgrid design tools to help you plan your full off-grid setup
- Wholesale options for agricultural operators outfitting multiple structures
Ready to spec the right kit for your container? Visit Westernharmonics to order or request a custom quote for your site.
Useful sources and further reading
The following sources informed this guide and are worth reviewing for deeper technical detail:
- Shipping Container Ventilation: The Complete Guide — USA Containers
- Container Ventilation: Passive vs Mechanical — VB Inc.
- How to Ventilate a Shipping Container — Boxhub
- Air Vents in a Shipping Container — HZ Containers
- Shipping Container Air Vents — Quickfit Container Accessories
A note on electrical codes: any solar ventilation system that connects to a structure's AC wiring, exceeds 50V, or is installed in a jurisdiction with specific low-voltage permitting requirements should be reviewed by a licensed electrician. Check with your local building department before starting work, particularly for occupied or habitable container builds.